![]()
Table of Contents
- Introduction
- Quickstart
- User Interface Overview
- NuFash Features
- FAQ
- Command Summary
- Credits
Introduction
Are you tired of deciding what to wear every morning? Do you often wonder whether your new clothing purchases would match your current wardobe? Have you ever misplaced your clothes? Well, your journey to a better dressing experience starts today with NuFash.
NuFash is a digital wardrobe desktop app for university students and/or those looking to better organise their clothes. The NuFash application allows users to input their clothing items (garments) into their own digital wardrobe, and be able to search through and match their various garments quickly. Some key features include:
- An easy-to-use digital wardrobe to manage your garments.
- A generated image to visually represent your garments in the wardrobe.
- Viewing functionality, to see certain pairing of garments.
- Selecting functionality, to keep track of when garments were used.
- Matching functionality, to suggest which garments could possibly be worn with each other.
The application is optimised for use through the Command Line Interface (CLI), allowing users to quickly add or modify items in their digital wardrobe. Our compact but powerful application also has a integrated and easy to use Graphical User Interface(GUI) providing a visual representation of a user’s entire wardrobe catalogue in mere seconds!
This User Guide is for new users of the NuFash app to learn and understand what are the various features that NuFash has to offer. If you are interested in providing feedback on issues or would like to follow our development process, please visit our GitHub page
Use our application to reduce clutter and be empowered to make wiser clothing decisions today!
Head over to our Quickstart to start learning about NuFash.
Quickstart
-
Ensure that you have Java
11or above installed on your Computer. -
You can download the latest
nufash.jarhere. -
Copy the file to the folder you want to use as the home folder for the NuFash application.
-
Double-click the file to start the app. A GUI similar to one depicted below should launch in a few seconds.
-
You may refer to the User Interface Overview for further details on the application’s interface or NuFash Features to try out our commands.
User Interface Overview
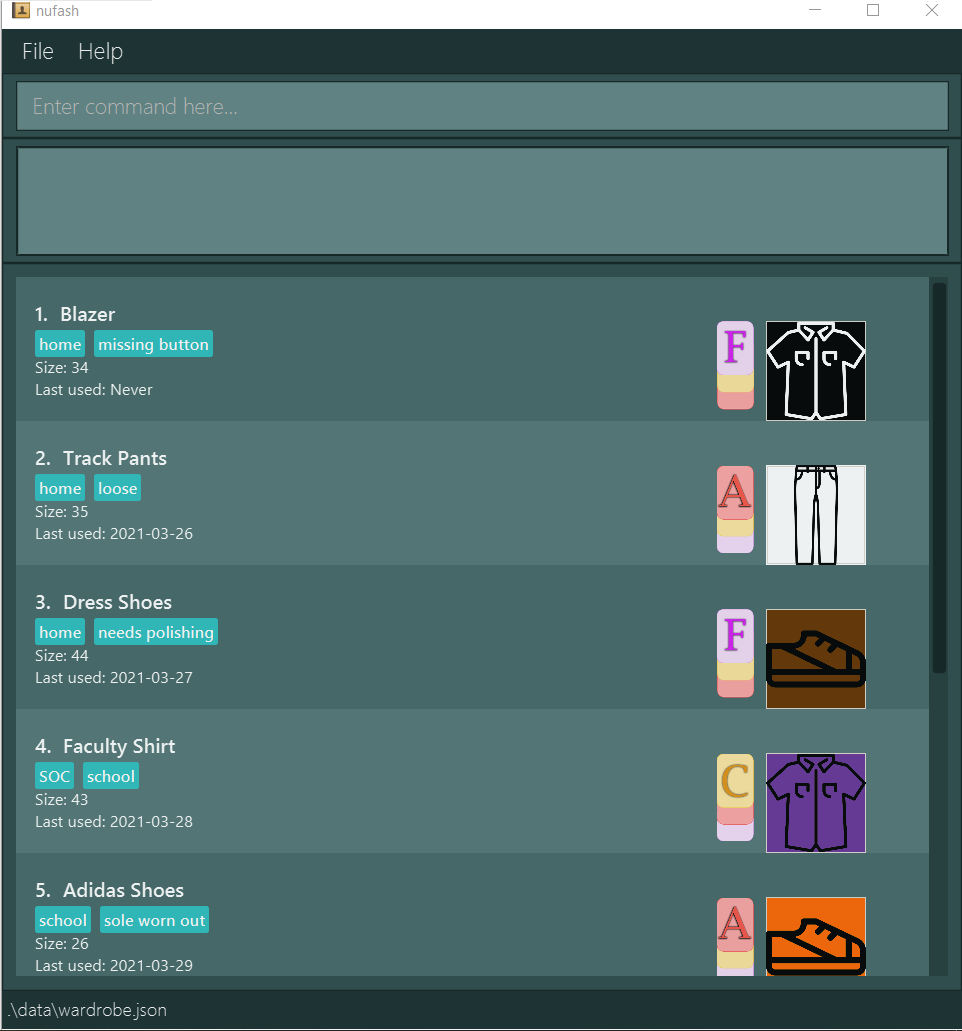
The NuFash interface consists of elements which work in unison to provide a smooth user experience. Use this section as a guide to navigate our GUI, and understand what should be displayed in your application.
Main GUI Window
The interface of the application is split into distinct components:
- Menu Bar
- Command Box
- Feedback Box
- Wardrobe Box

Menu Bar
The Menu Bar contains drop-down menus allows you to access useful functions. These functions are:
- Exit - Exits the application
- Help - Opens the Help window
Command Box
The command box allows you to key in your commands to control your digital wardrobe.
You can type a command in the command box and press the enter key on your keyboard to execute it. For example, typing
the help command and pressing the enter key will open the help window.
Some example commands you can try:
-
addn/shirt s/45 c/blue r/casual t/upper d/stained d/torn: Add a casual blue shirt which is stained, torn and of size 45 to your wardrobe. -
delete6: Deletes the 6th garment shown in the current list. -
match2: Displays the available compatible matches for the 2nd garment in list. -
list: Displays all garments in the wardrobe. -
exit: Exits the app.
You can cycle through the previously entered commands by using the up and down arrow keys.
You may refer to the NuFash Features below for details of each command.
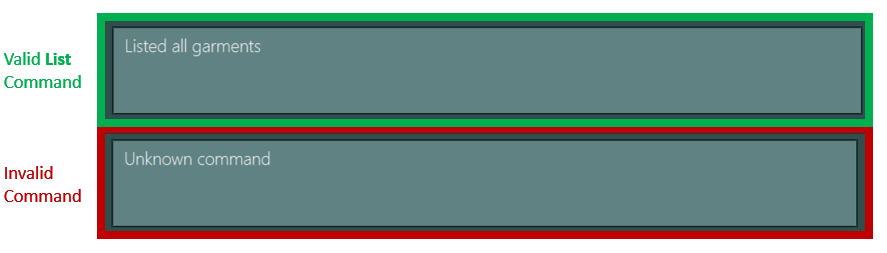
Feedback Box
The feedback box displays the success messages when commands entered into NuFash are valid. Alternatively, it will show an error message if the command is invalid or can’t be recognised.
Wardrobe Box
The Wardrobe box shows the listing of all current garments in their digital wardrobe.
Each listing is comprised of the following components:
- Listing Index
- Listing Details
- Listing Tags
- Listing Generated Image

Listing Index
The listing index assigns each unique garment listed into the digital wardrobe a number: INDEX.
This INDEX is used in various commands, e.g. select, edit and view.
Listing Details
The listing details display the the garment’s attributes such as name, size and the date it was last used.
Listing Tags
The listing tags allow users to key in various descriptions about the garments, e.g garment’s location and/or garment’s condition.
Listing Generated Image
The listing generated Image allows for the garment to be represented in a visual form. It displays the dress-code of the garment (either formal(F), casual(C) or active-wear(A)), its type (either upper(T-shirt), lower(Pants) or foot-wear(Shoe)) and its respective colour.
NuFash Features
Feature Syntax and Terminology
- Words in
UPPER_CASEare the inputs to be supplied by the user e.g. inadd n/NAME,NAMEis a parameter which can be used asadd n/striped shirt. - The different inputs that the user can input are the following:
-
n/NAME, the name of the garment, limited to 40 characters -
s/SIZE, the size of the garment, which is a positive integer less or equal to 200 -
c/COLOUR, the colour of the garment -
r/DRESSCODE, the dresscode of the garment -
t/TYPE, the type of the garment -
d/DESCRIPTION, the description of the garment, with each description being limited to 15 characters
-
- Items in square brackets are optional e.g.
n/NAME [c/COLOUR]can be used asn/striped shirt c/blueor asn/striped shirt. - Inputs can be in any order e.g. if the command specifies
n/NAME c/COLOUR,c/COLOUR n/NAMEis also acceptable. - Items with
…after them can be used multiple times including zero times.
e.g.[d/DESCRIPTION]...can be unused,d/stained,d/torn d/stainedetc. - Input for
c/COLOURis case-insensitive, and is eitherbeige,black,blue,brown,green,grey,orange,pink,purple,red,white, oryellow. - Input for
r/DRESSCODEis case-sensitive, and is eithercasual,CASUAL,formal,FORMAL,activeorACTIVE. - Input for
t/TYPEis case-sensitive, and is eitherupper,lowerorfootwear.
- The format listed for each feature refers to the arrangement of inputs required for the command associated with the feature to work as intended.
NuFash is divided into two sets of features, each allowing the application to achieve one of its goals.
Wardrobe Management Features
The first category of features is wardrobe management. These features
aim to achieve the goal of allowing users to better organise their wardrobes.
These include help, add, list, delete, clear, edit and find.
Viewing Help: help
Shows an in-app user guide to various commands.

Format: help
Adding a Garment to the Wardrobe: add
Adds a garment with a name, size, colour, dress code and type into the wardrobe, along with optional descriptions.
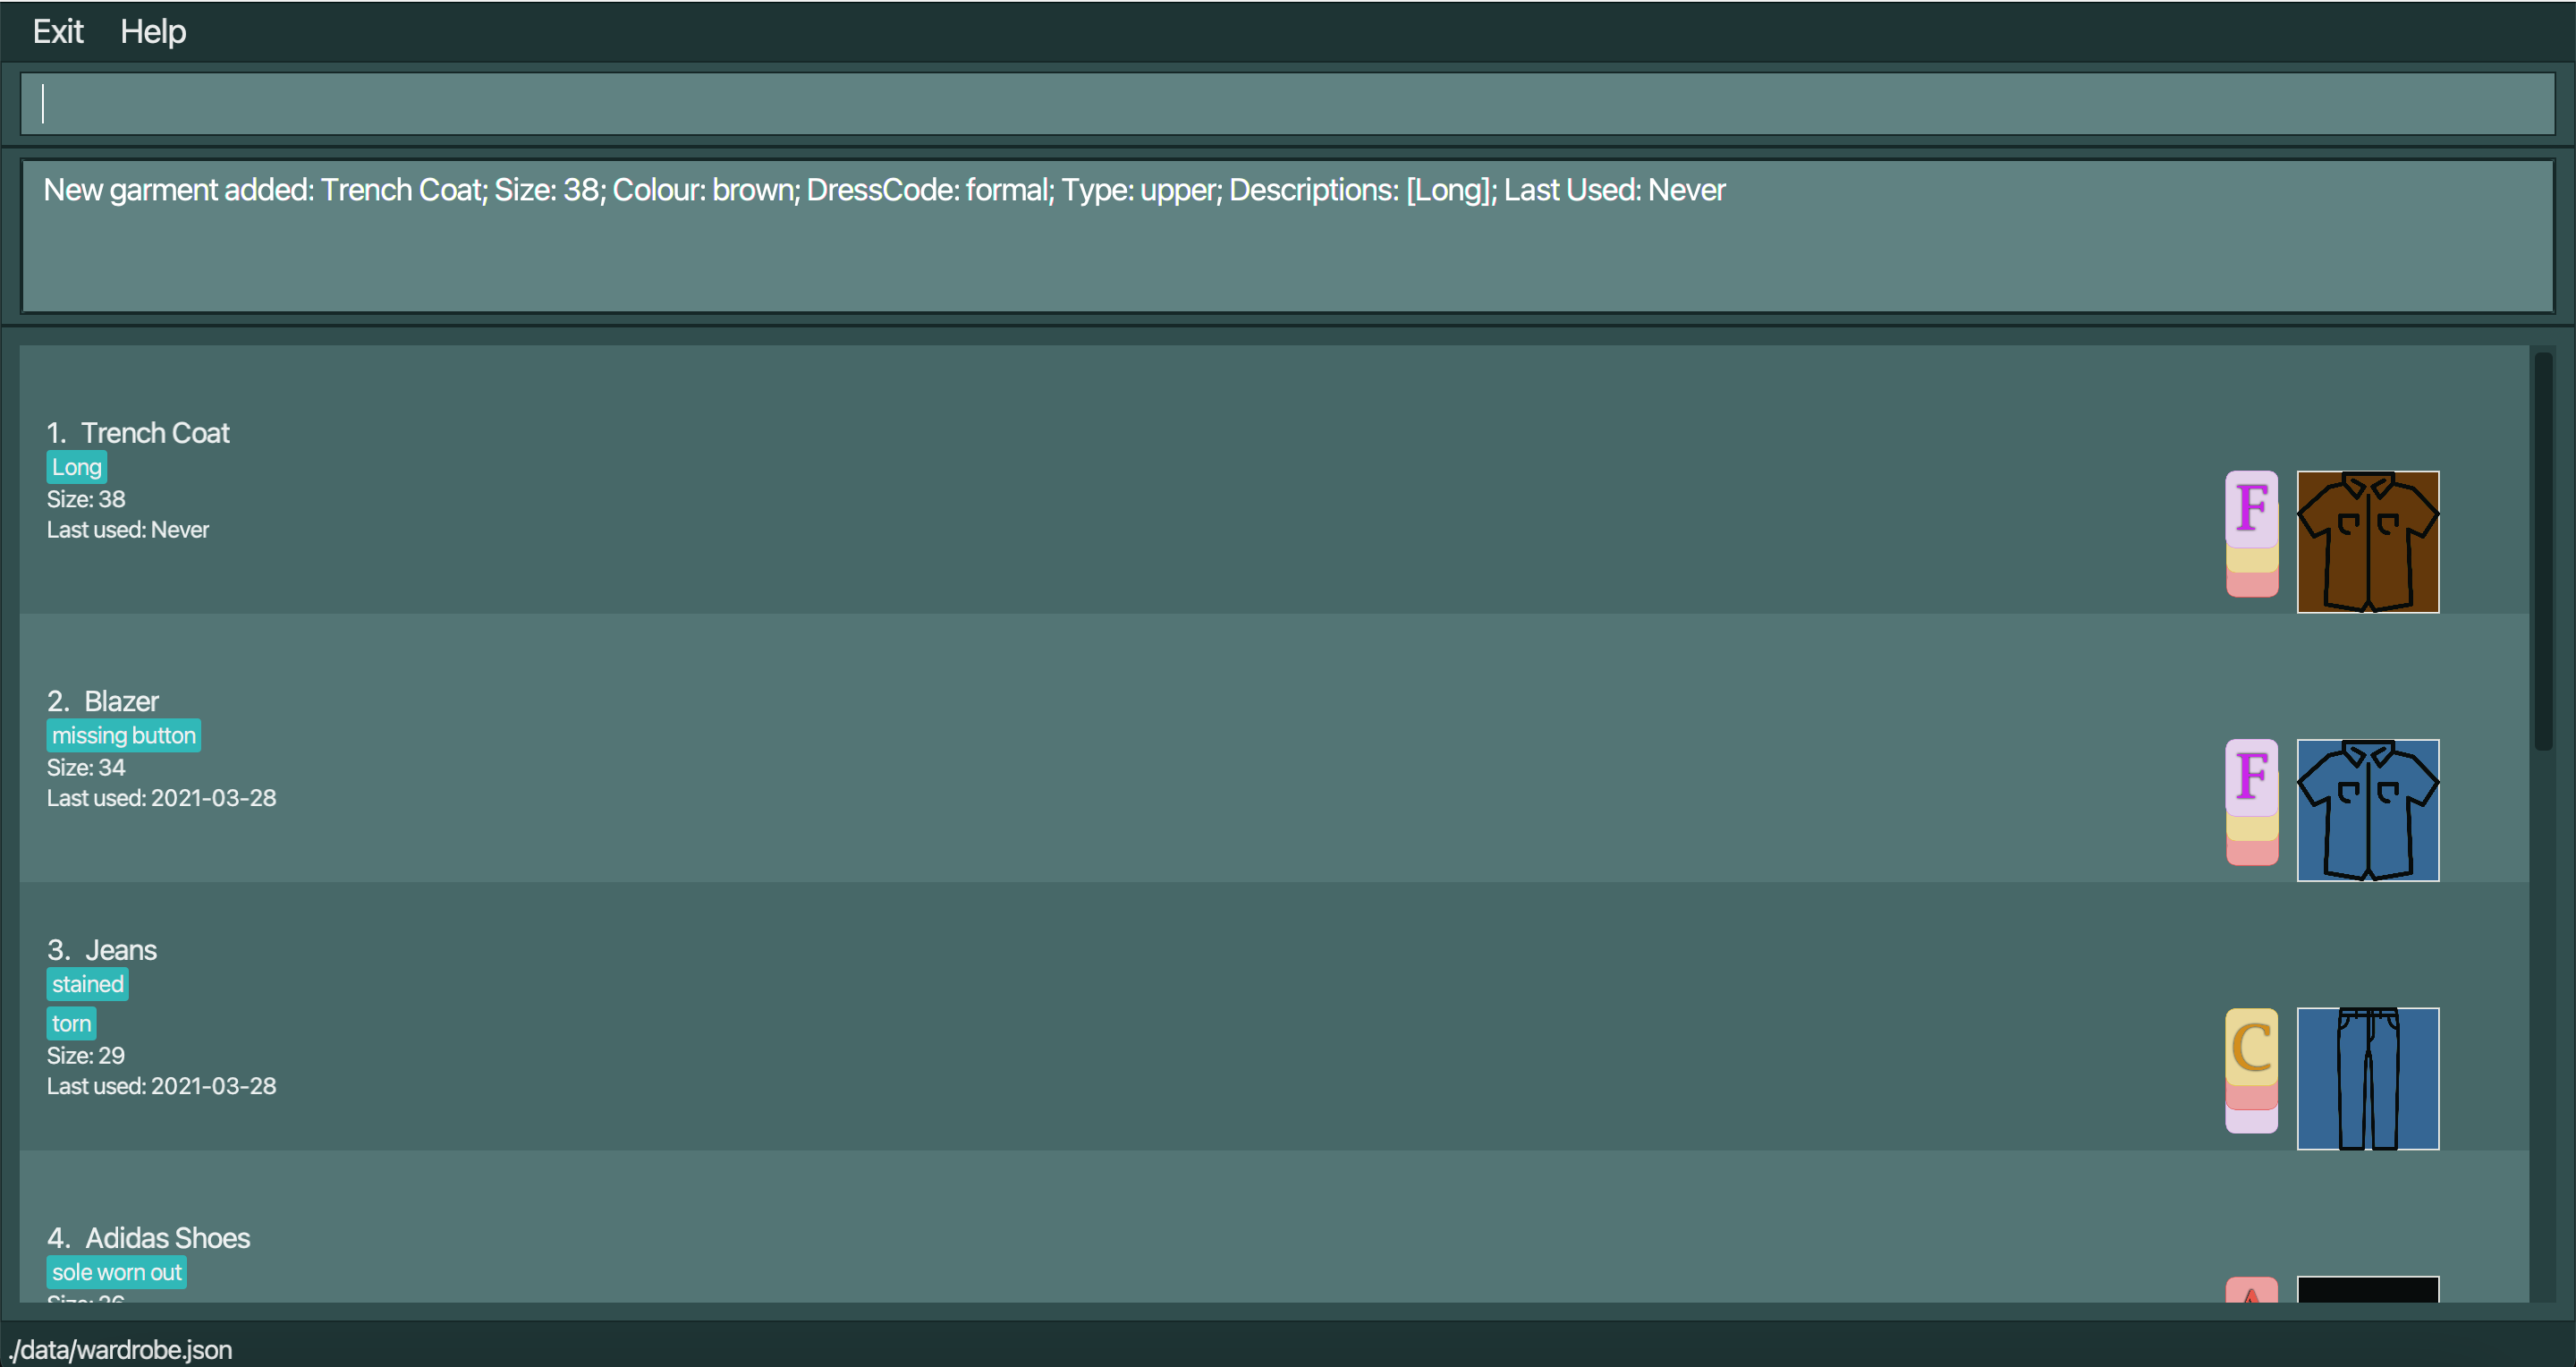
Format: add n/NAME s/SIZE c/COLOUR r/DRESSCODE t/TYPE [d/DESCRIPTION]...
![]() Tips:
Tips:
-
SIZEis a positive integer. -
DRESSCODEis either ‘formal’, ‘casual’ or ‘active’. -
TYPEis either ‘lower’, ‘upper’ or ‘footwear’. - Press
Ctrl+aas a shorthand command to pre-fill theaddcommand format in the command box.
Example:
-
add n/favourite t shirt s/30 c/blue r/casual t/upper
Listing all Garments in the Wardrobe: list
Shows a list of all garments in the wardrobe
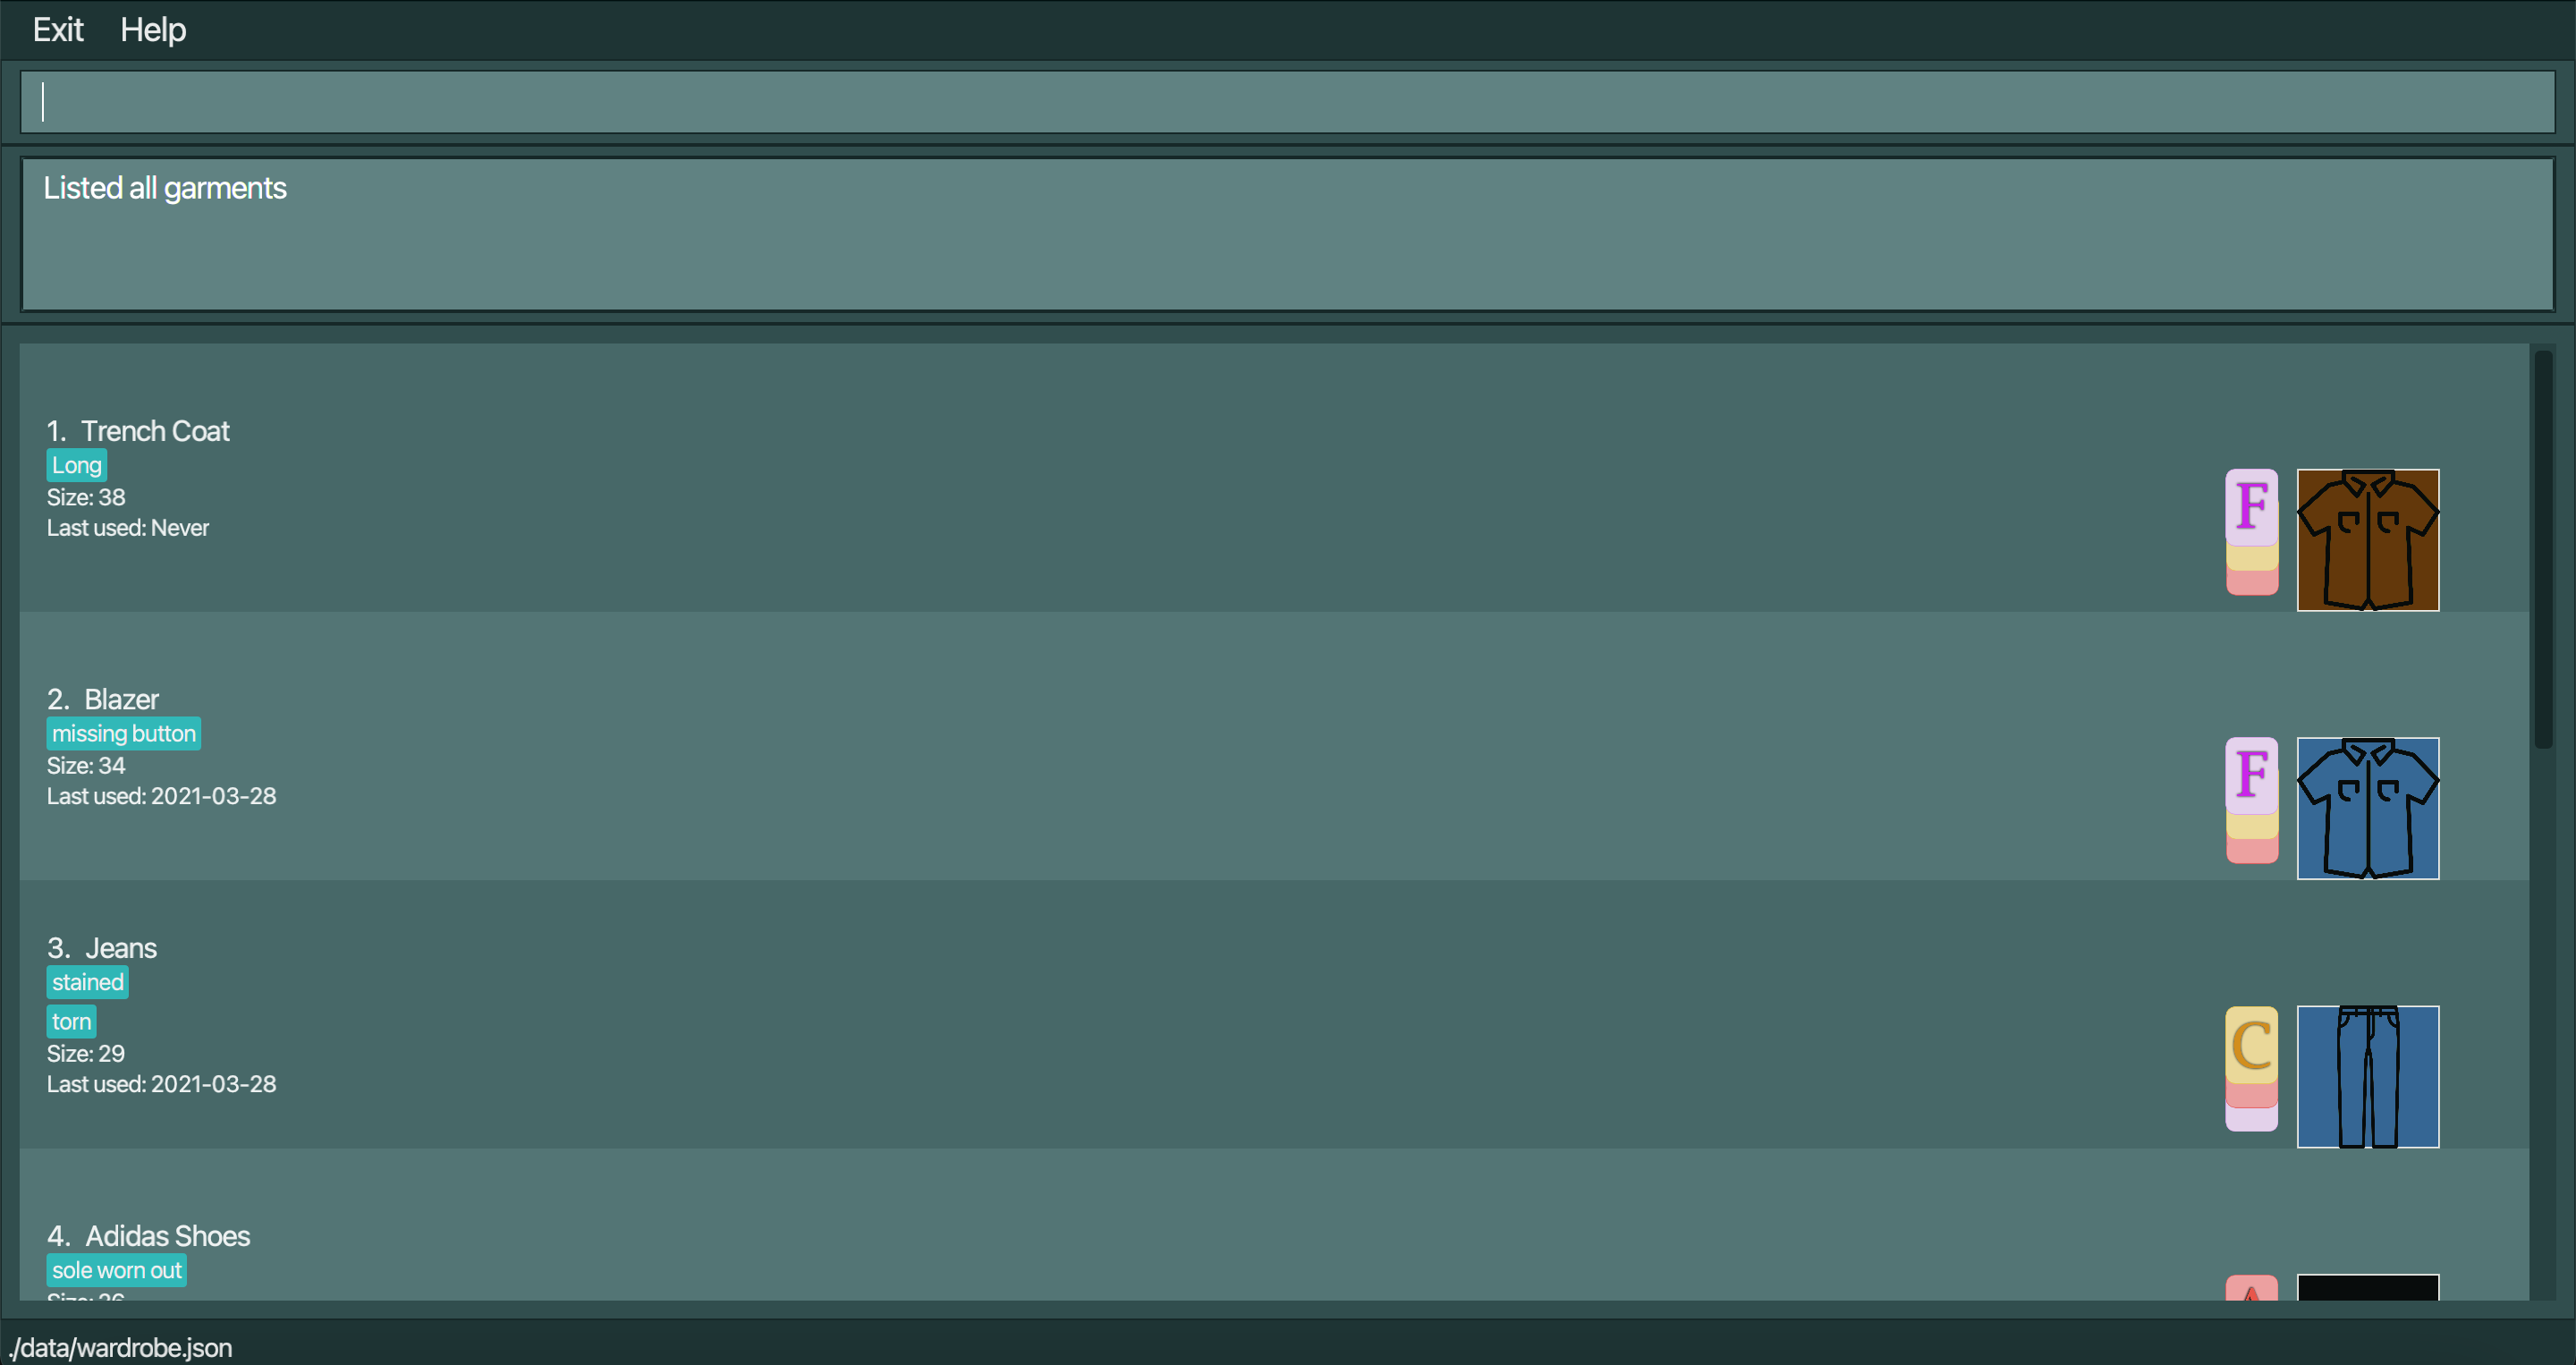
Format: list
![]() Tips:
Tips:
- Displays the list of all garments in chronological ordering, to easily find the garments that have not been worn in a long time.
Deleting a singular Garment in the Wardrobe: delete
Removes a Garment, associated with the given index, from the wardrobe.
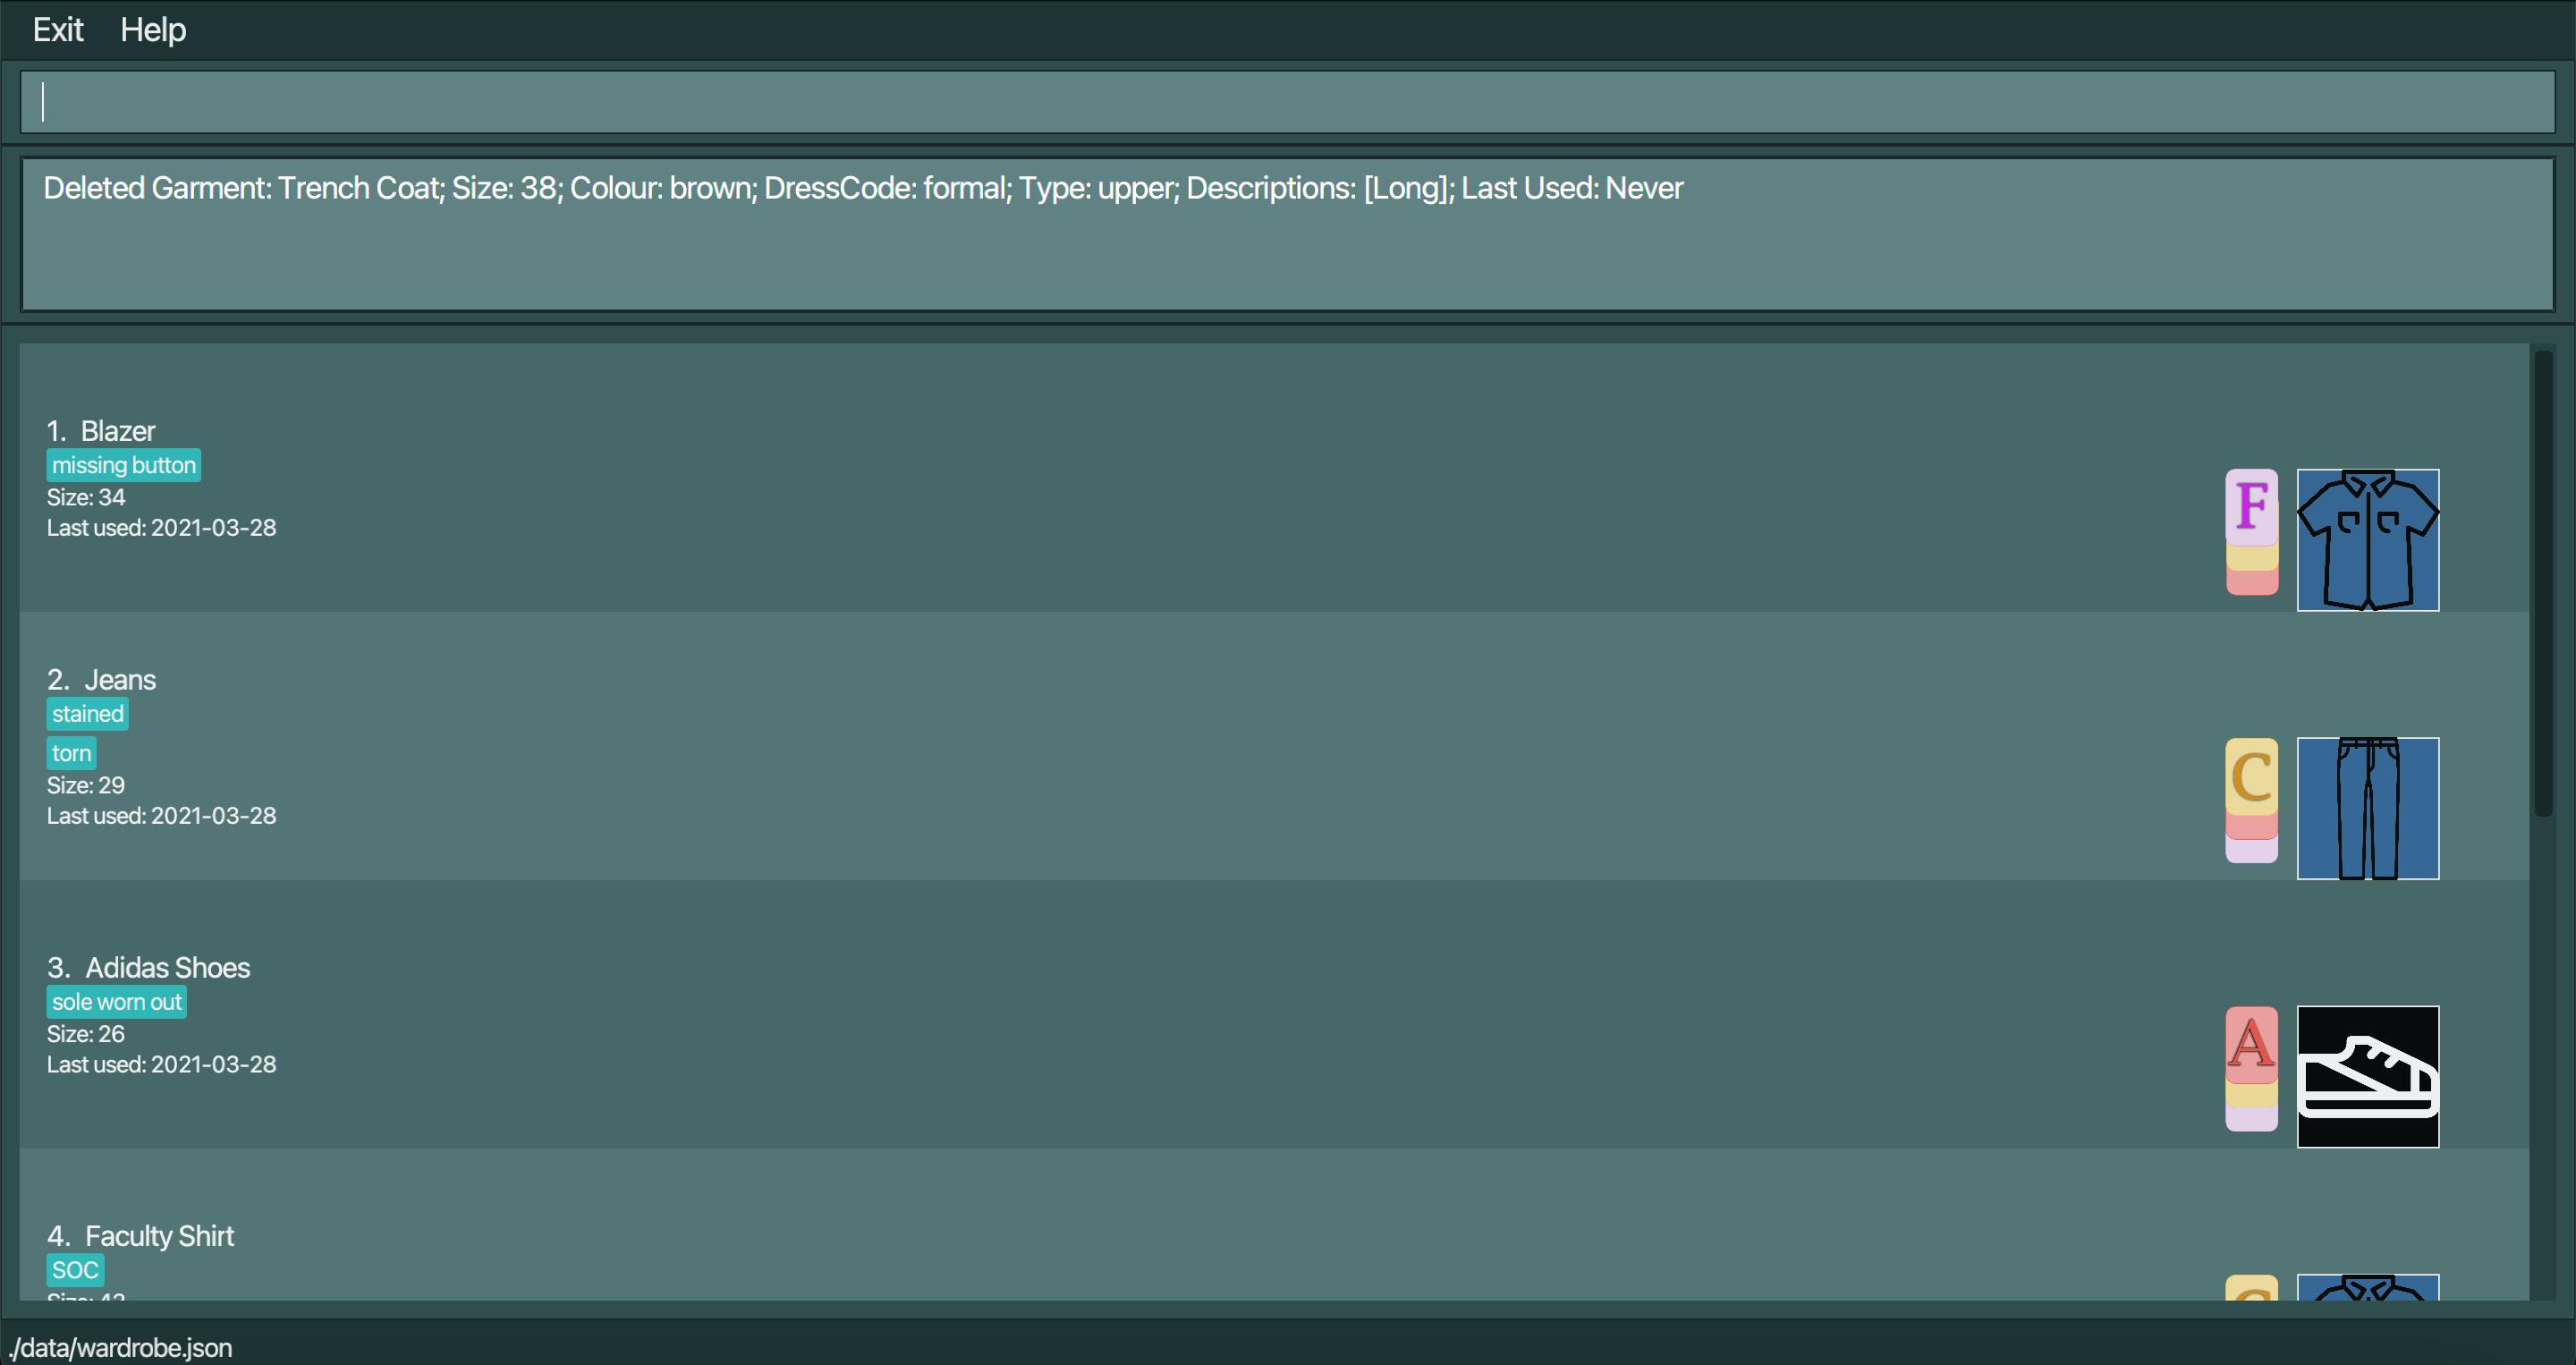
Format: delete INDEX
![]() Tips:
Tips:
- Deletes the article of clothing at the specified
INDEX - The
INDEXrefers to the index number shown in the list command - The
INDEXmust be a positive integer 1, 2, 3, …
- Press
Ctrl+das a shorthand command to pre-fill thedeletecommand format in the command box.
Example:
-
delete 7
Removes the 7th Garment in list of clothes currently shown.
Clearing all Garments in Wardrobe : clear
Clears all existing garments in the wardrobe.
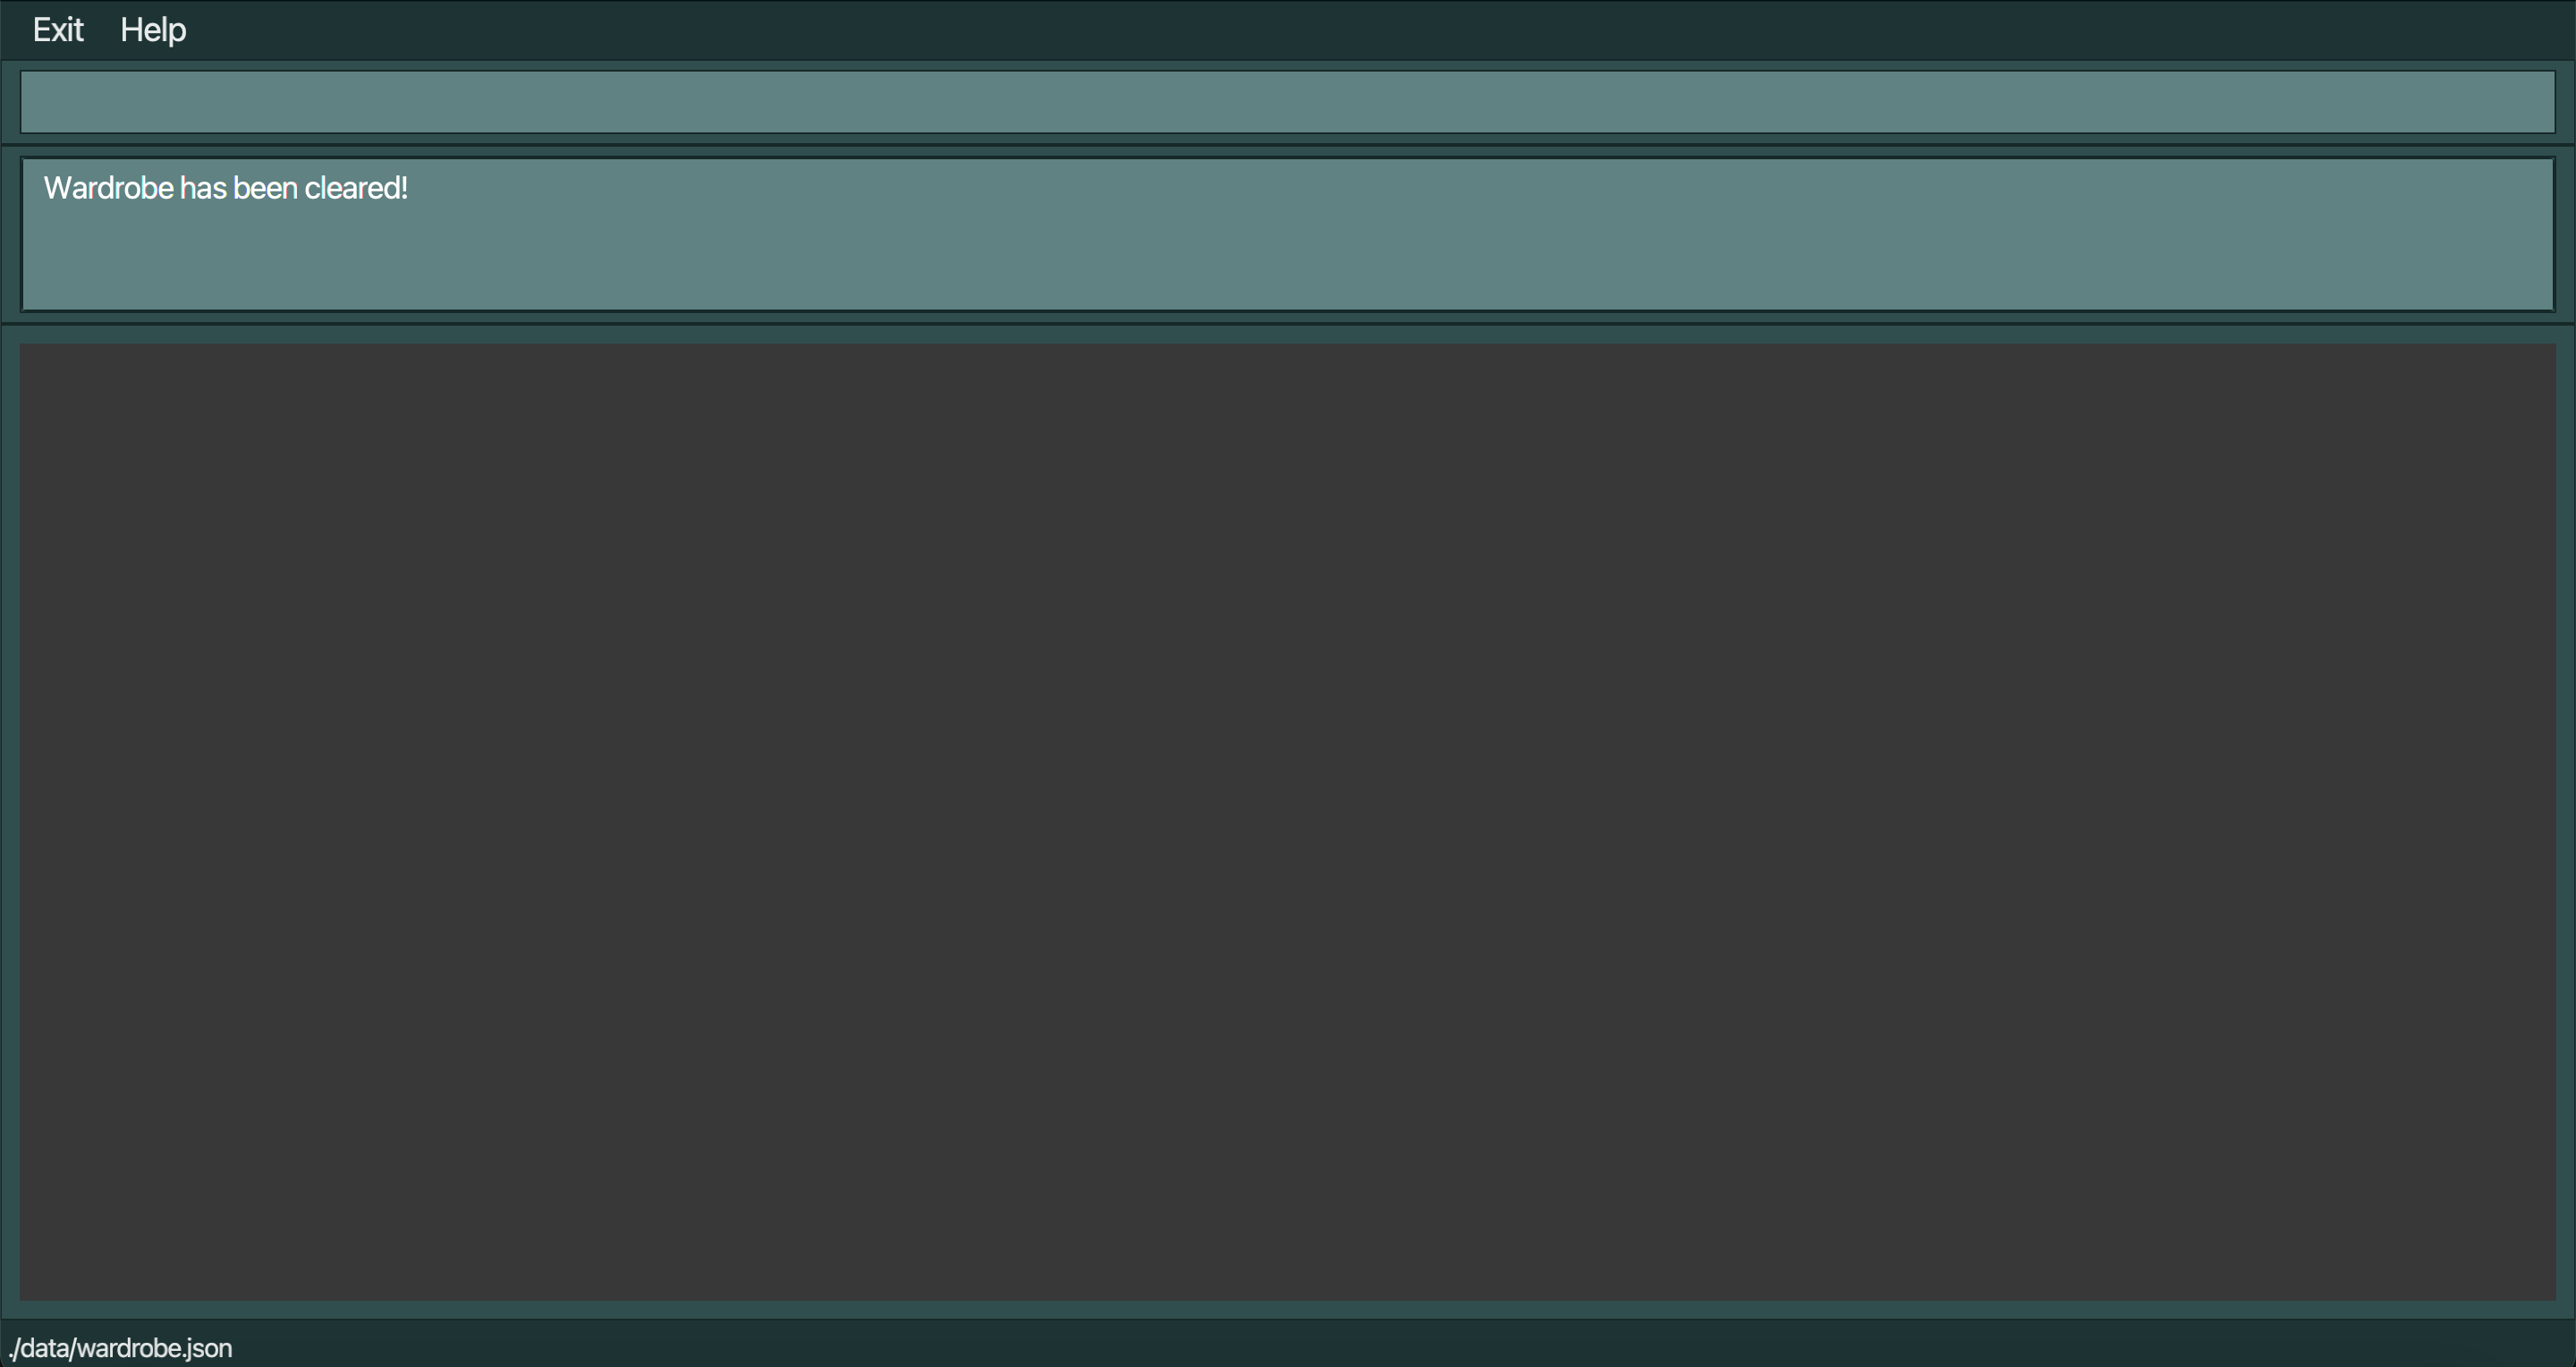
Format: clear
Editing a singular Garment in Wardrobe: edit
Edits an existing garment in the wardrobe.

Format: edit INDEX [n/NAME] [s/SIZE] [c/COLOUR] [r/DRESSCODE] [t/TYPE] [d/DESCRIPTION]...
![]() Tips:
Tips:
- Edits the garment at the specified
INDEX.
- The
INDEXrefers to the index number shown in the list command. The index must be a positive integer 1, 2, 3, … - At least one of the optional bracketed fields must be provided.
- Existing values will be updated to the input values.
- Press
Ctrl+eas a shorthand command to pre-fill theeditcommand format in the command box.
Example:
-
listfollowed byedit 1 c/red s/30
Edits the colour and size of the 1st garment in the wardrobe to be red and 30 respectively.
Finding Garments in Wardrobe by keywords: find
Finds all garments that matched specified keywords during search.
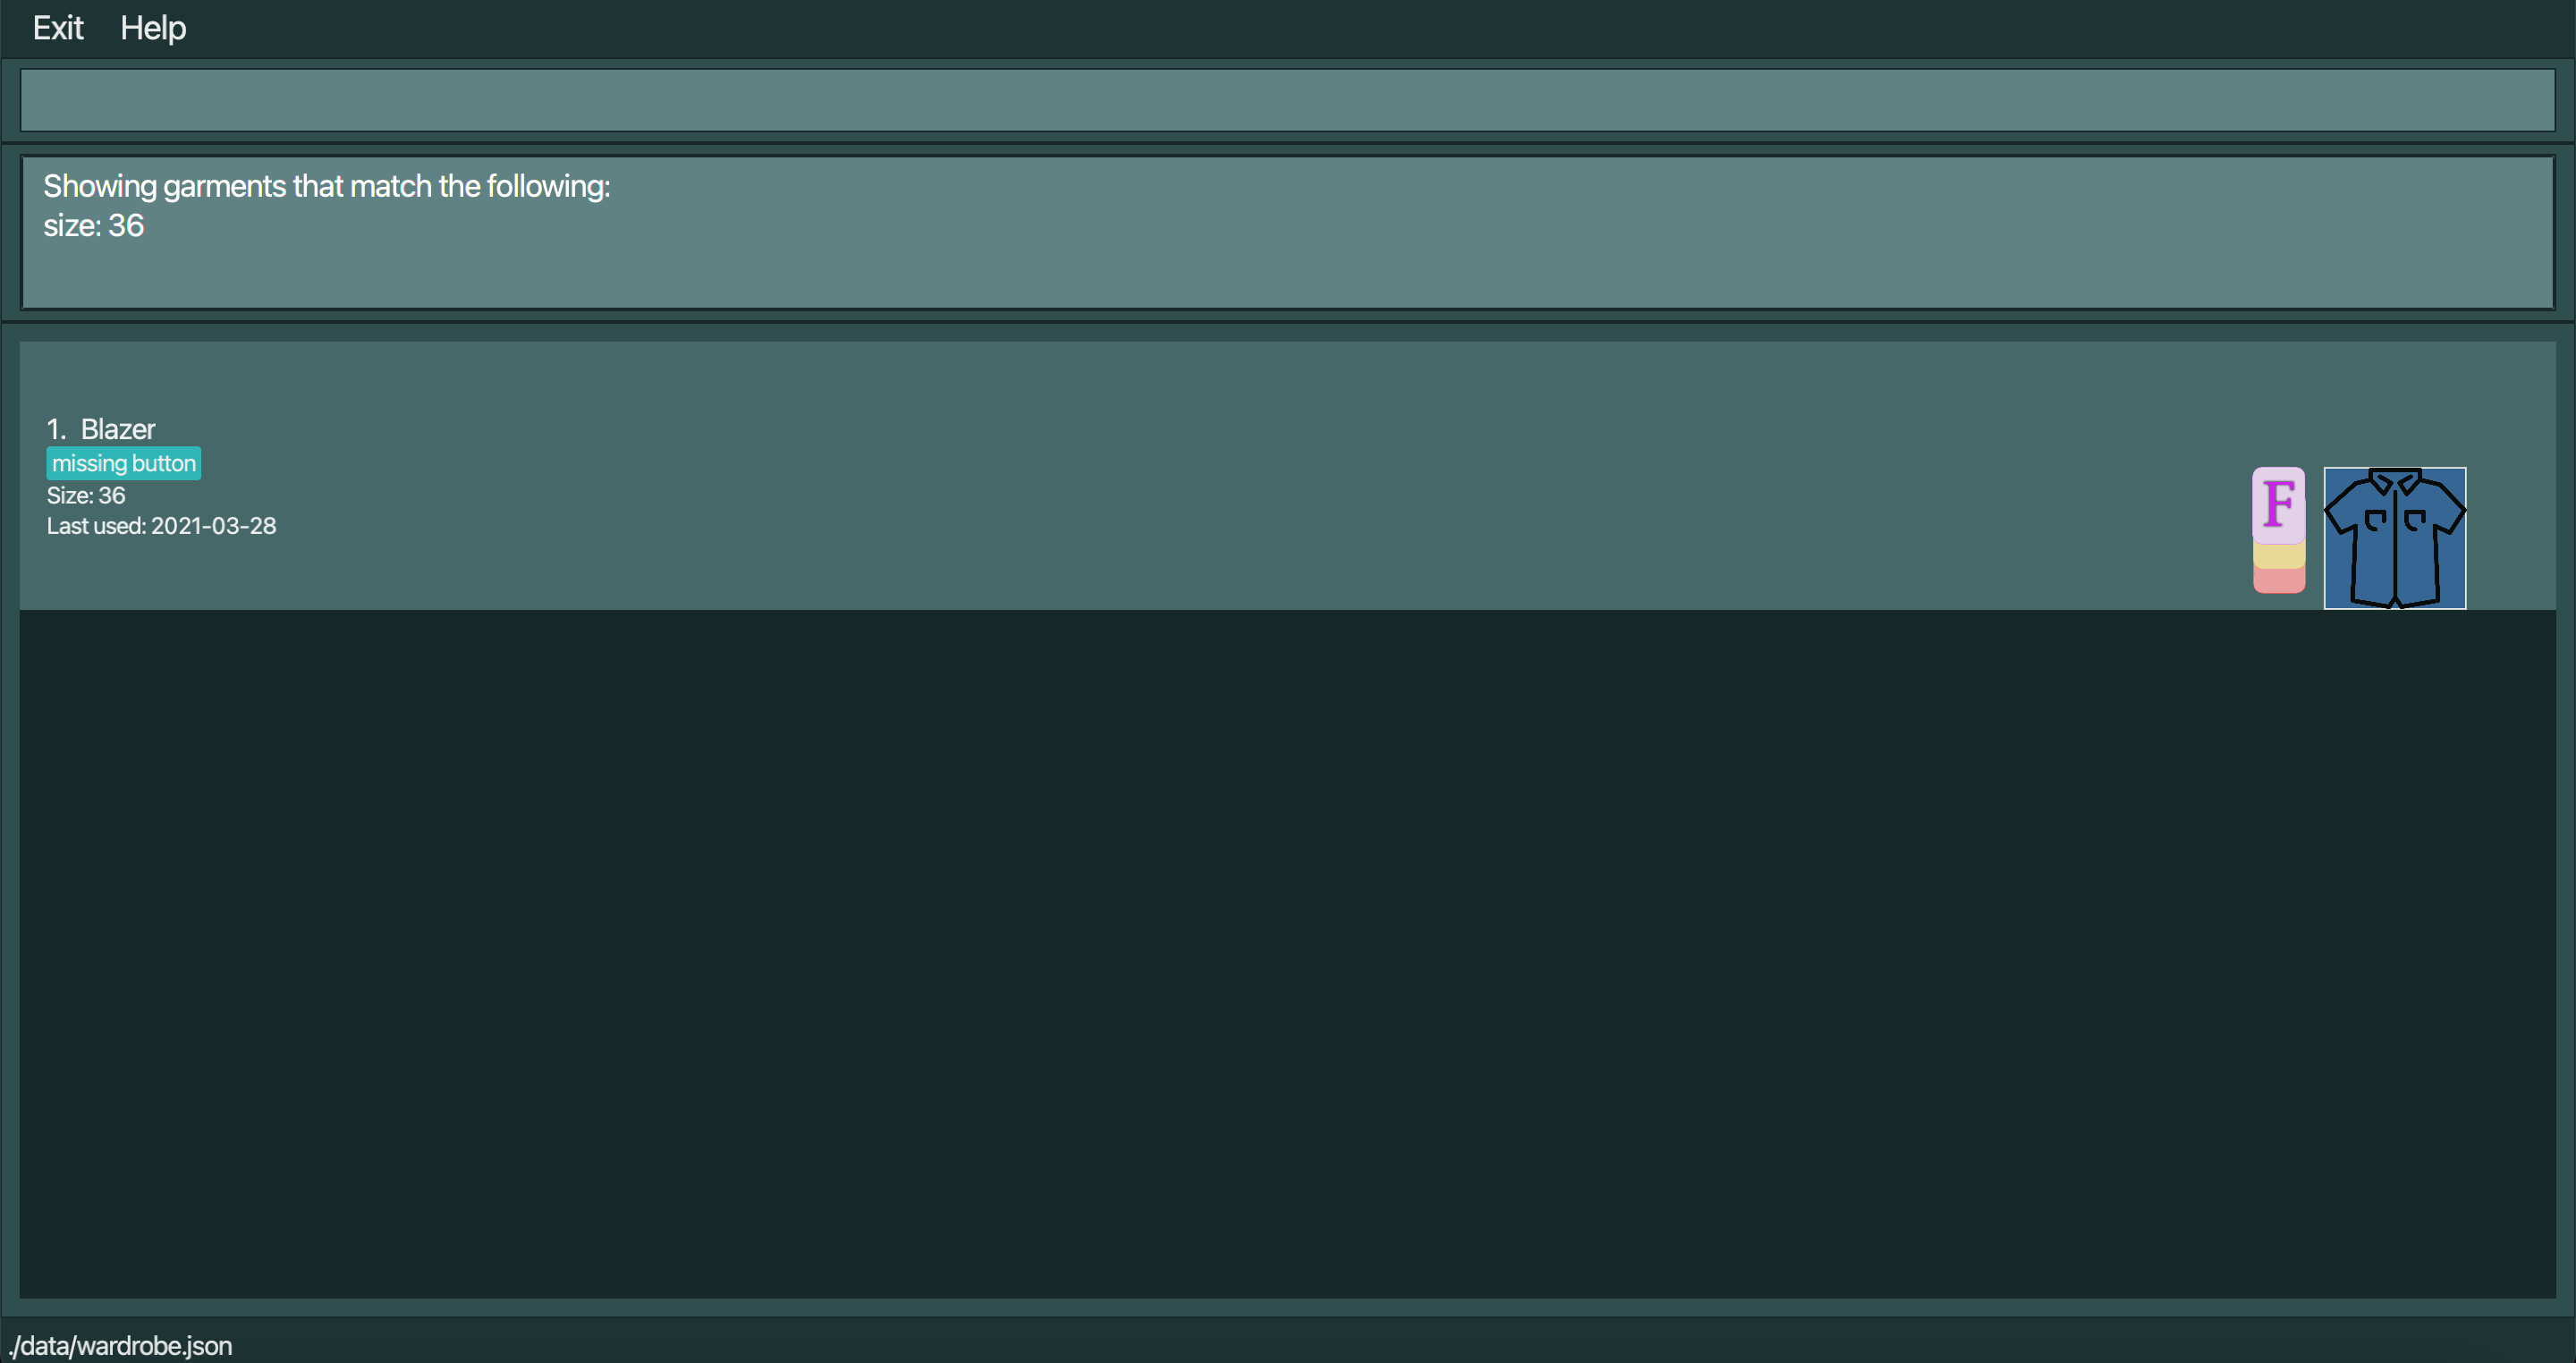
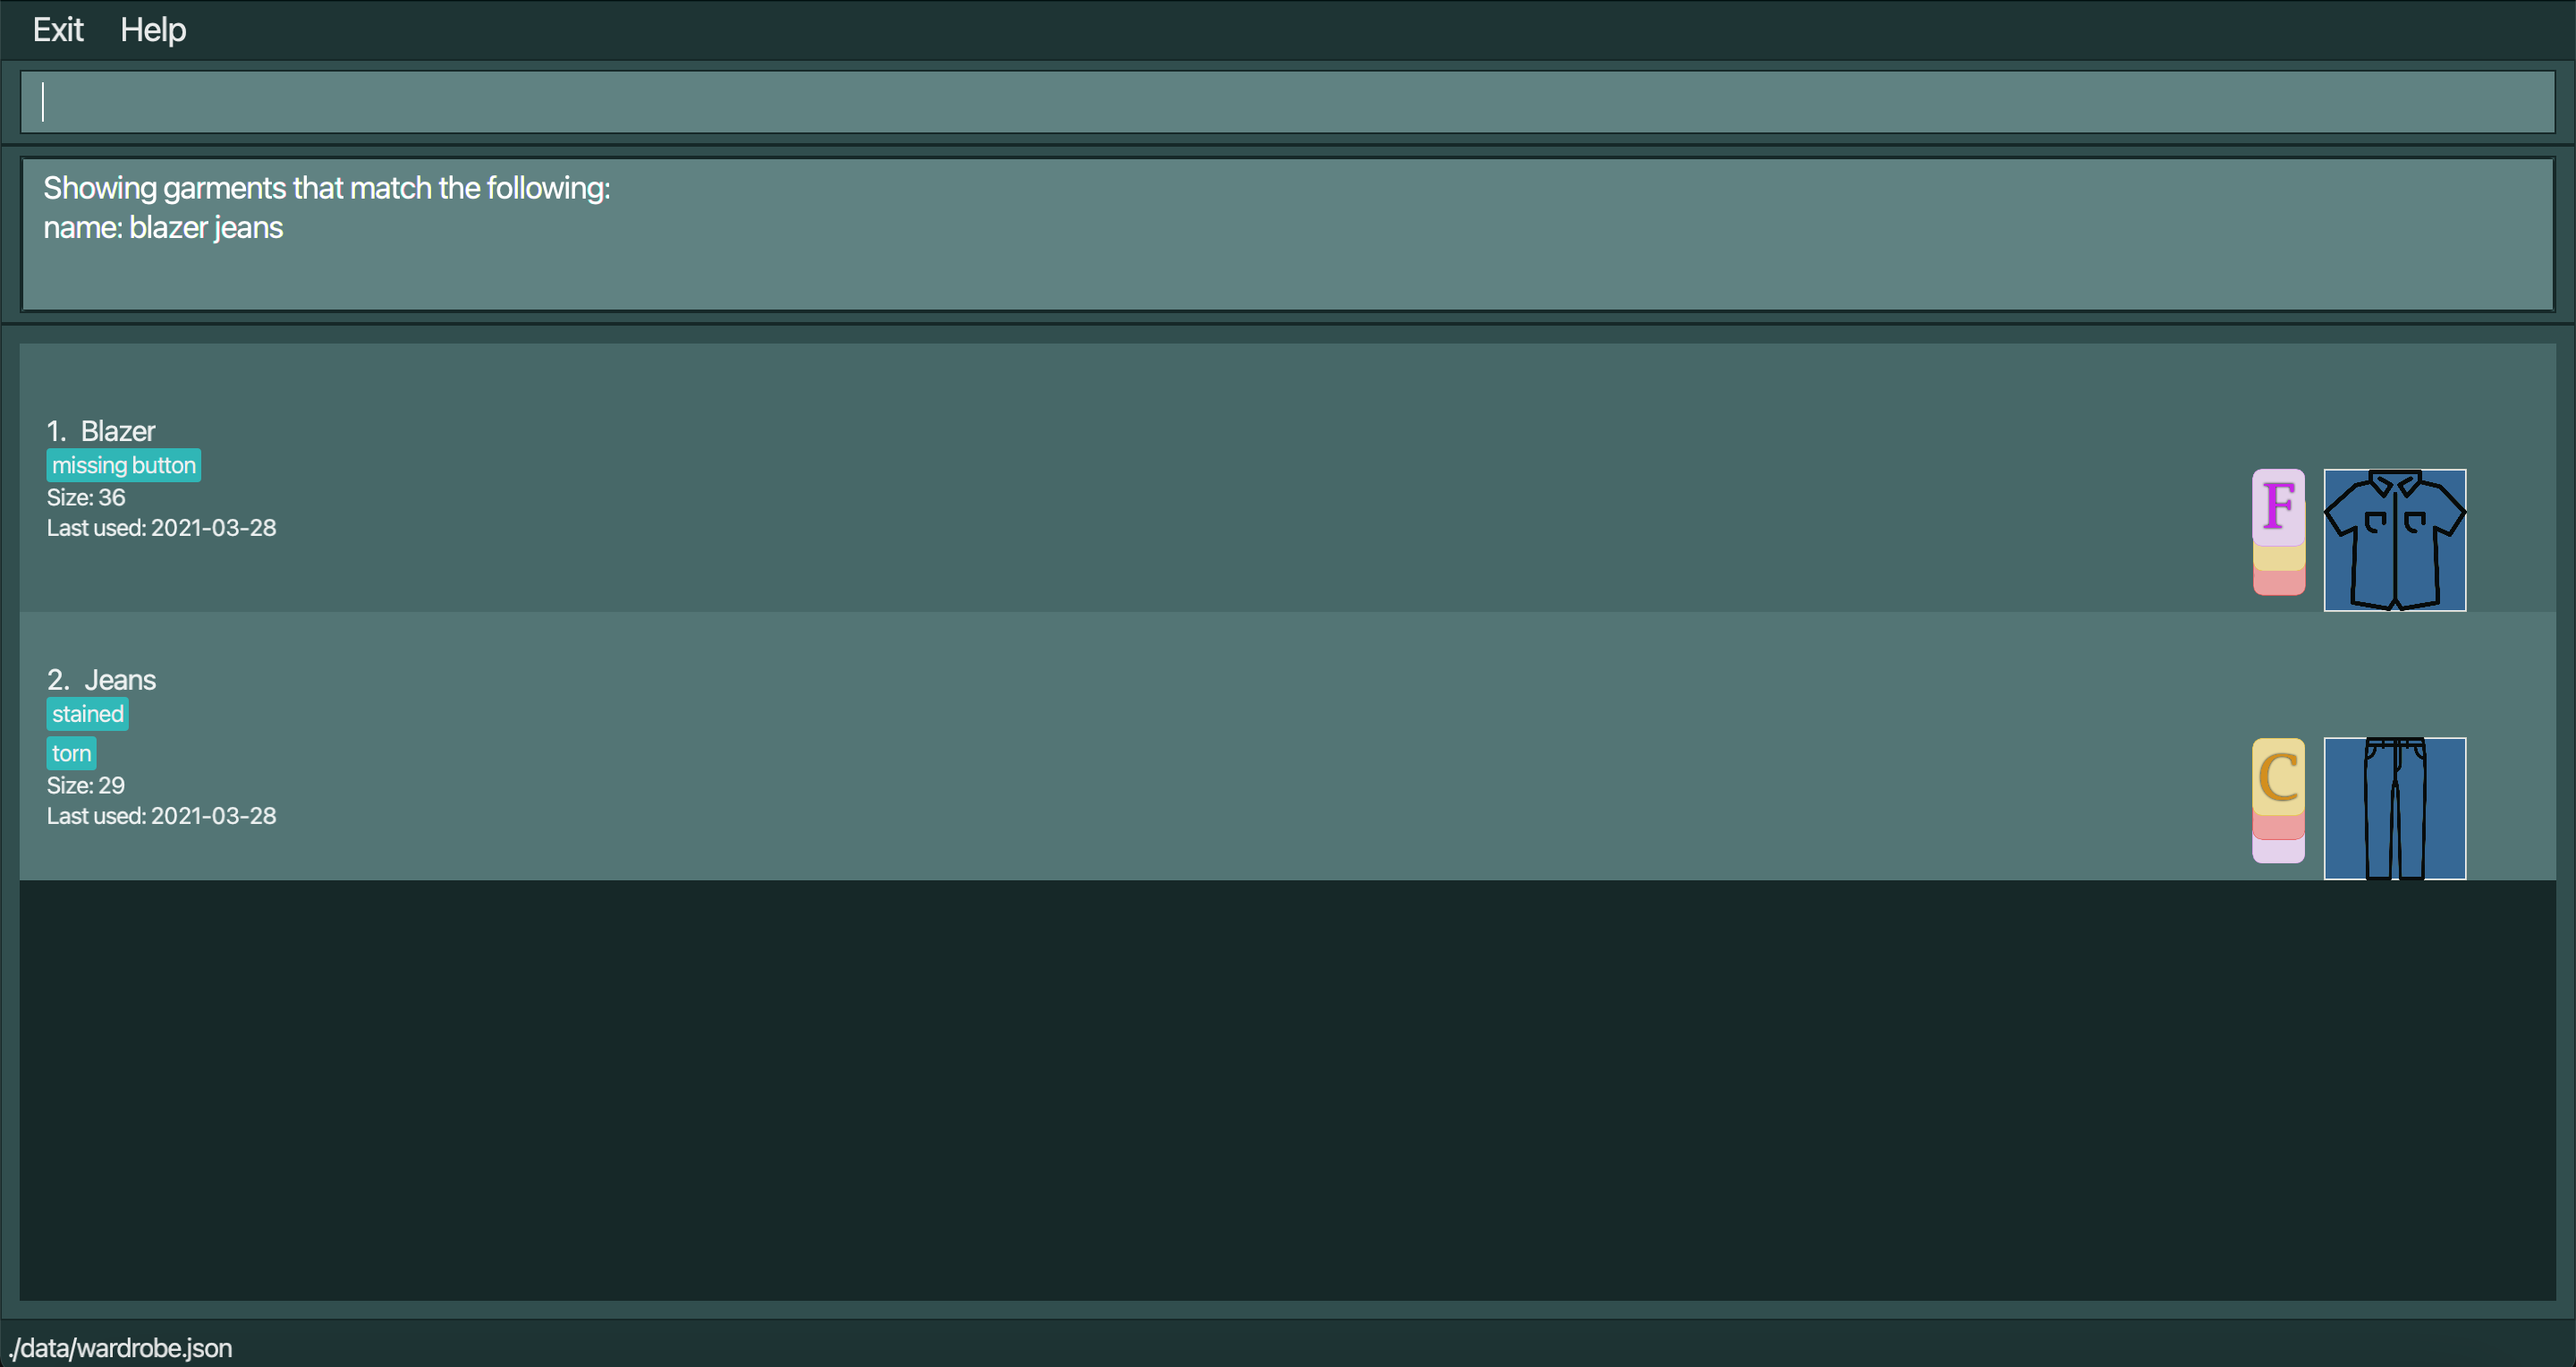
Format: find [n/NAMES] [s/SIZES] [c/COLOURS] [r/DRESSCODES] [t/TYPES] [d/DESCRIPTIONS]
![]() Tips:
Tips:
- At least one of the optional bracketed fields must be provided and non-empty.
- A set of keywords (search phrase) can be used for finding.
- At least one keyword in a search phrase should be present in the garments to get results.
- Keywords are not case-sensitive.
- The list of all garments with attributes that contain the specified keywords will be shown.
Example:
-
find n/worn out jeans
Returns all garments whose name has at least one of the words in the search phrase, “worn out jeans”. -
find n/wOrN OUt Jeans
Returns all garments as the previous example, as search phrase need not be case-sensitive -
find n/worn ou jea
Returns all garments whose name has at least one of the words in the search phrase, “worn out jea” -
find c/white s/36 23
Returns all garments that are white and are either sized 36 or 23.
Exiting the program: exit
Exits the program.
Format: exit
Outfit Building Features
The second category of features is outfit building. These features
aim to achieve the goal of providing users with clothing suggestions, allowing
them to choose outfits that are more aesthetically appealing.
These include match, select, and view.
Matching Garments to create an outfit: match
Finds all garments that match the colour and dress code, and are of different types.
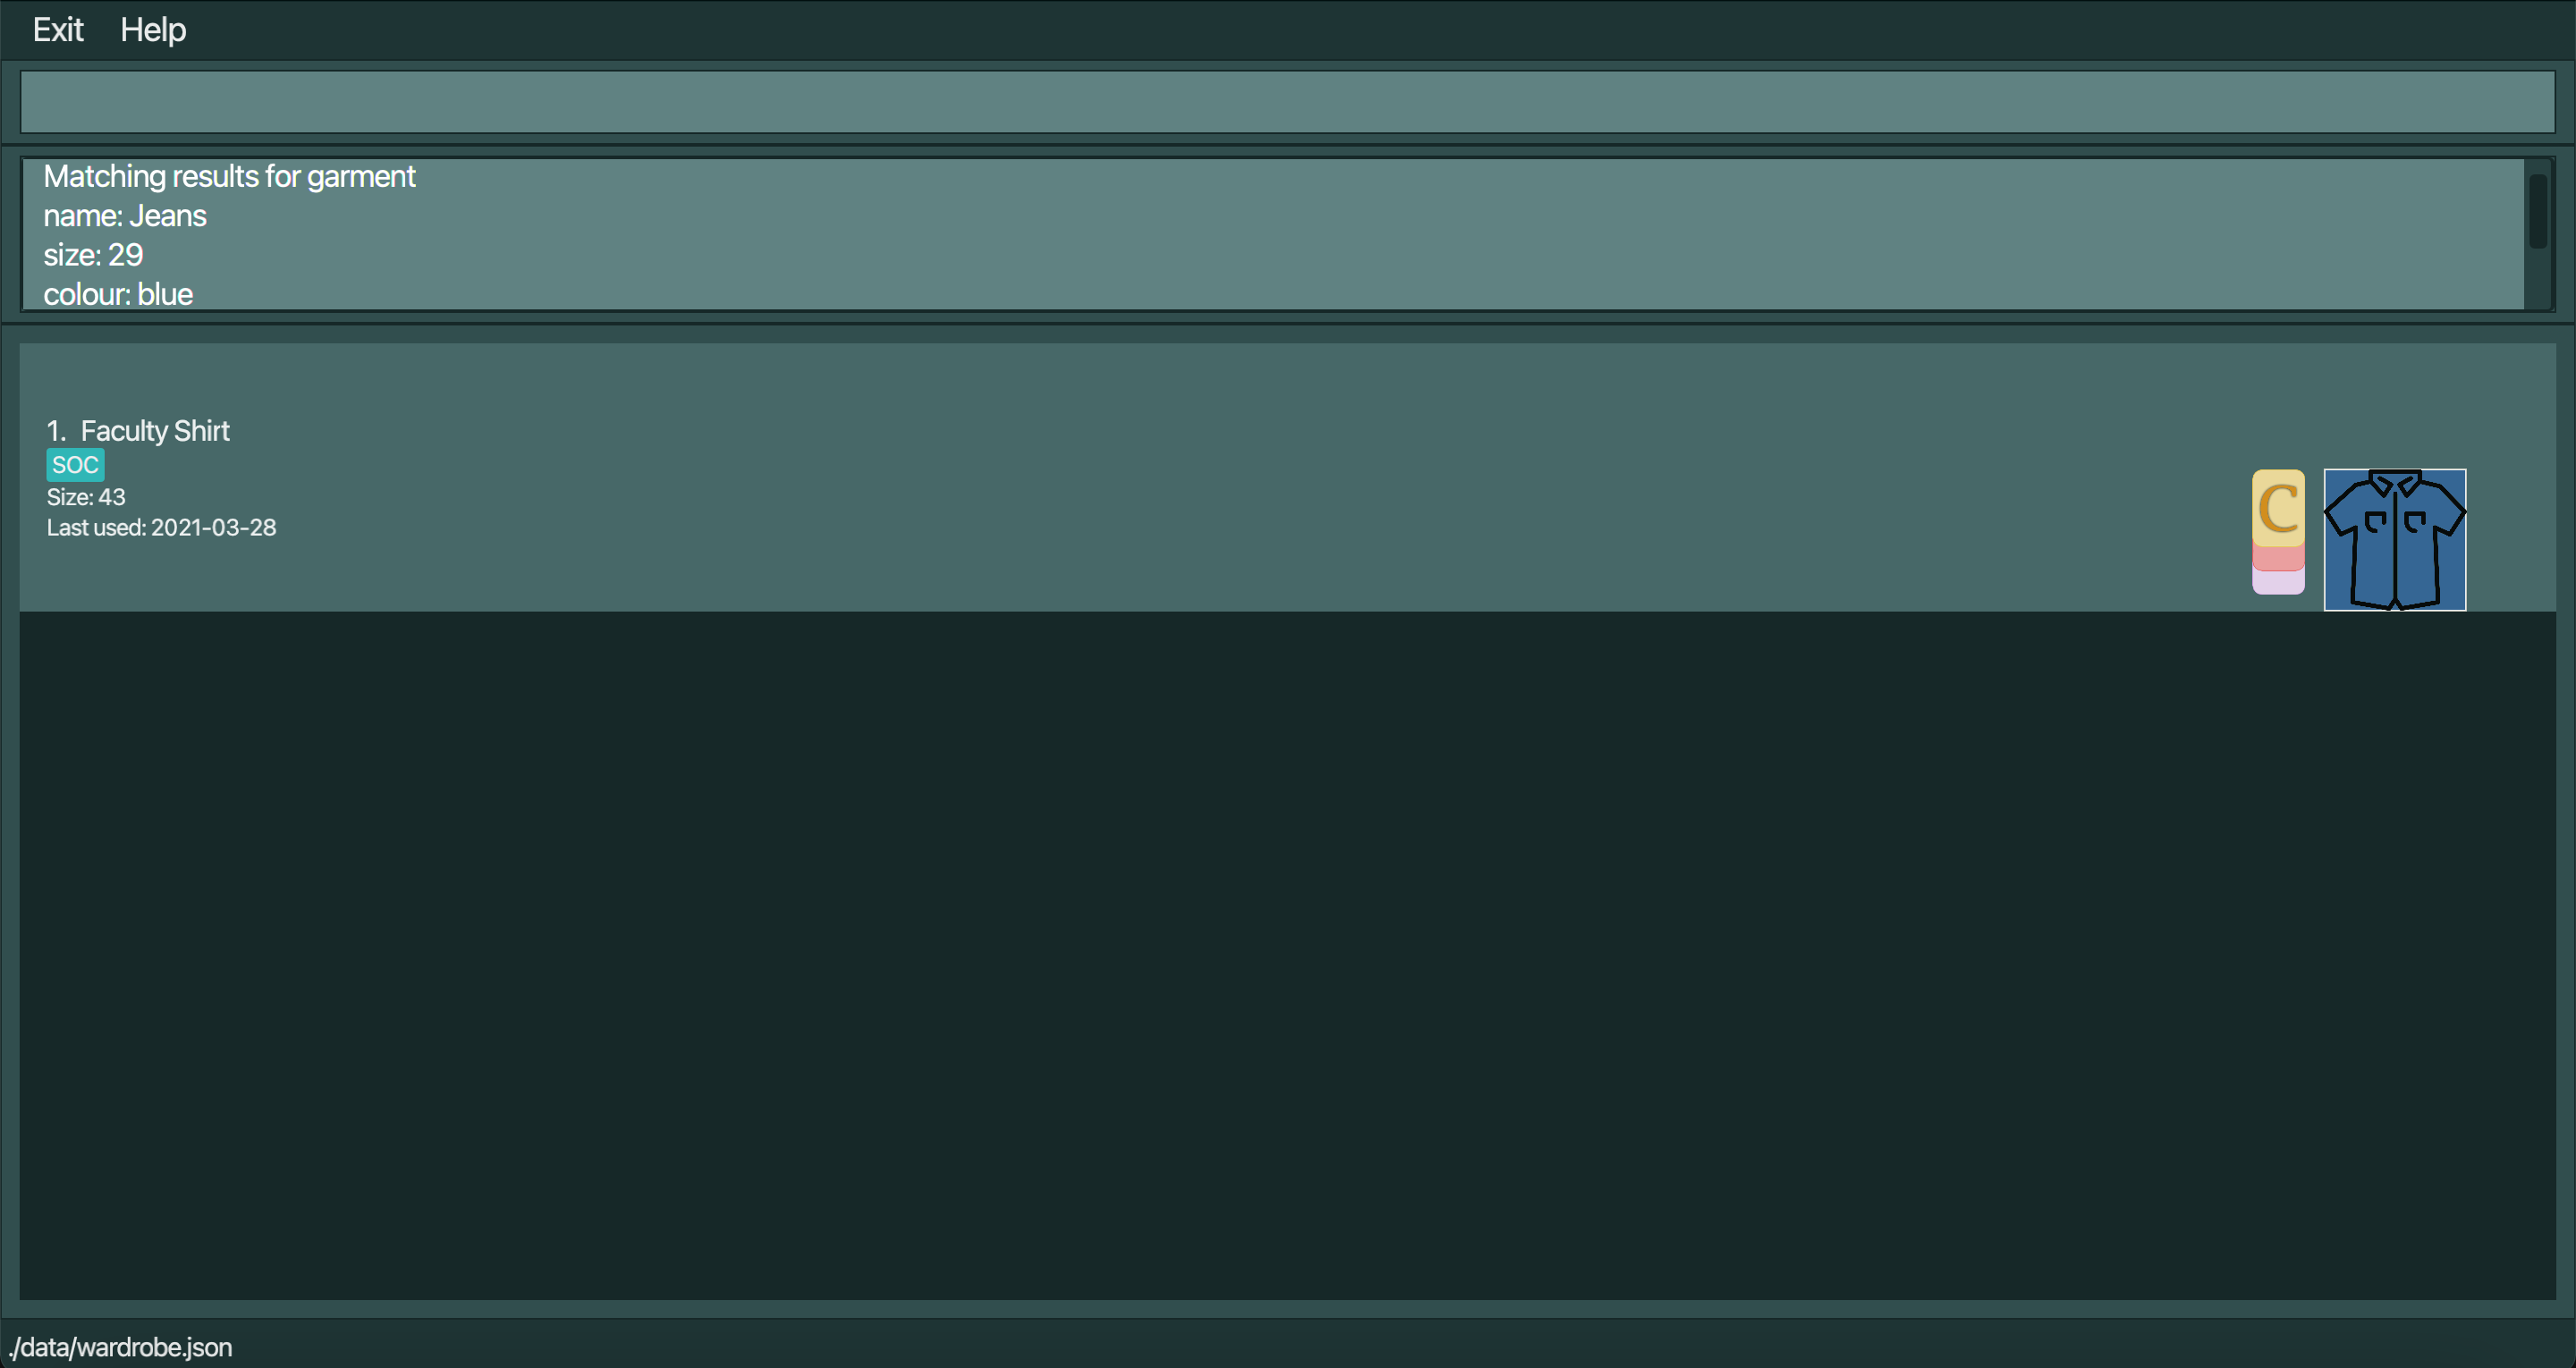
Current Supported Format: match INDEX
To be Implemented Format: match INDEX [INDEX]
Examples:
-
match 1
Returns all the articles of clothing that match the colour and dress code of the garment at index 1 in the list of garments on display, and of different types. -
match 1 2[using 2 indices to find their matching garments is to be implemented]
Returns all the articles of clothing that match the colours and dress code of the garments at indices 1 and 2 in the list of garments on display, and are of different types compared to the garments at indices 1 and 2.
Checking out a Garment from the Wardrobe: select
Select a garment to check out of the wardrobe, indicating that it shall be worn today.
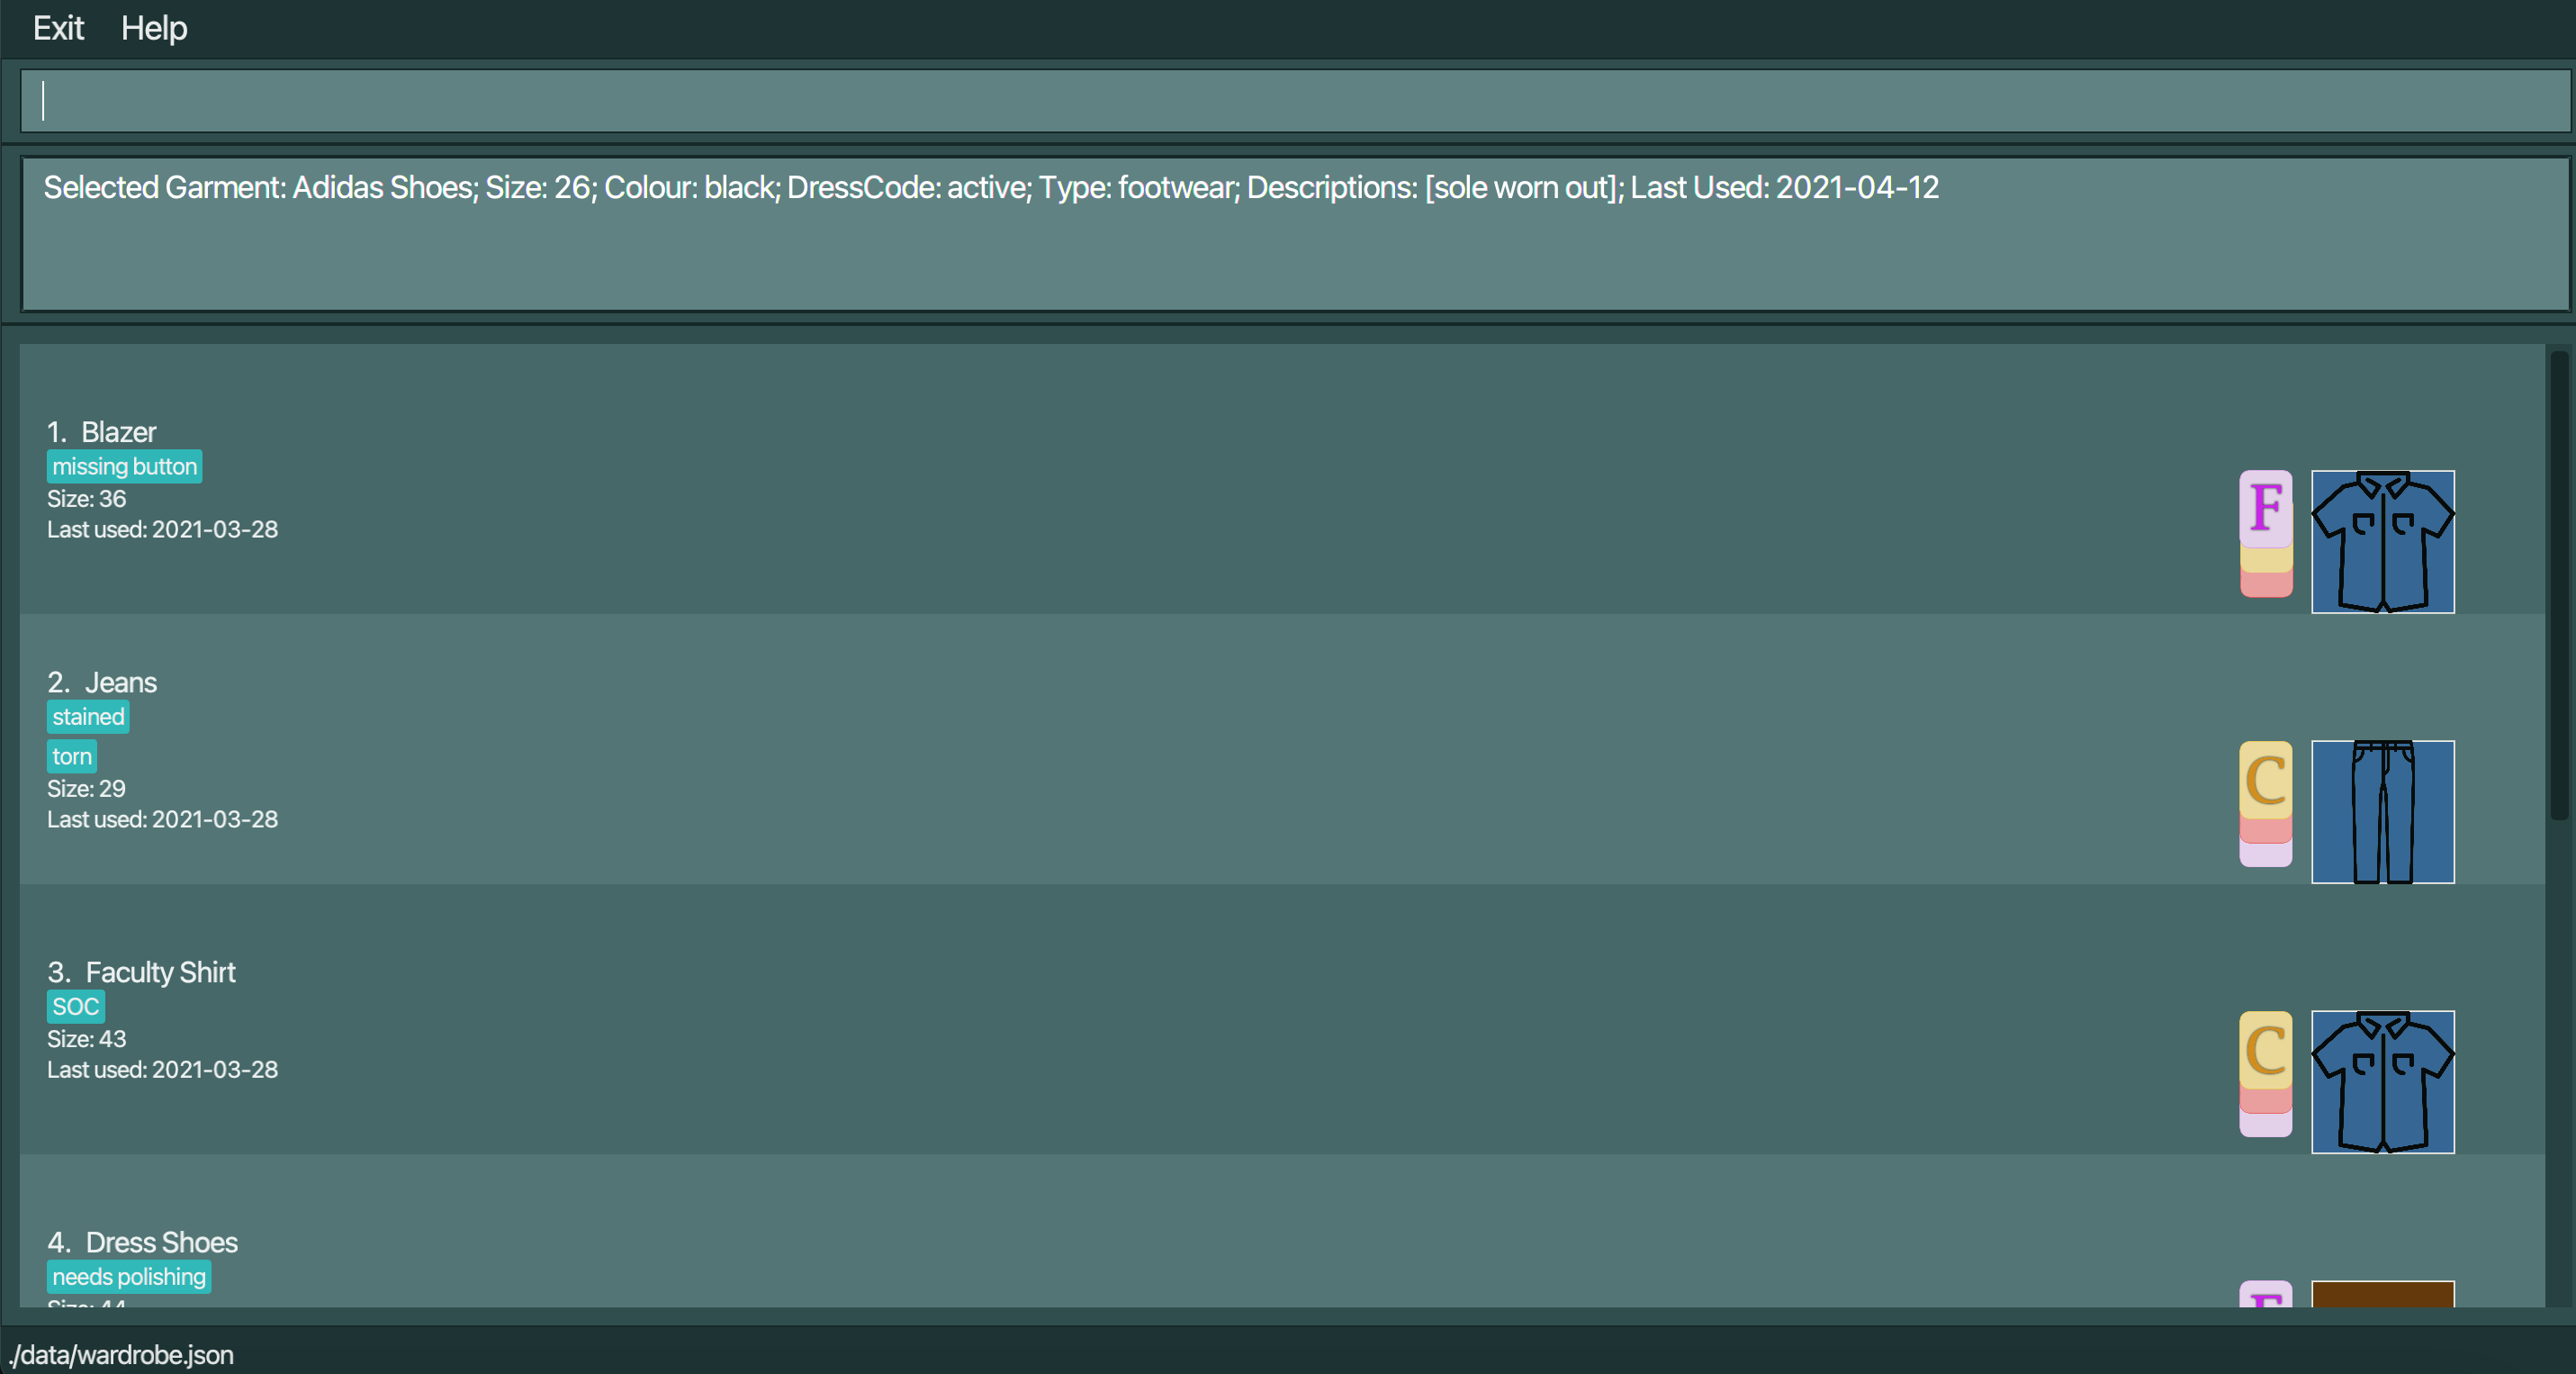
Format: select INDEX
![]() Tips:
Tips:
- Selects the garment at the specified
INDEX.
- The
INDEXmust be a positive integer 1, 2, 3, …
Example:
-
select 1
Updates the Last Used date, and places this garment at the end of the list
Viewing a valid outfit: view
View a set of 3 garments associated with the given indexes that create an outfit.
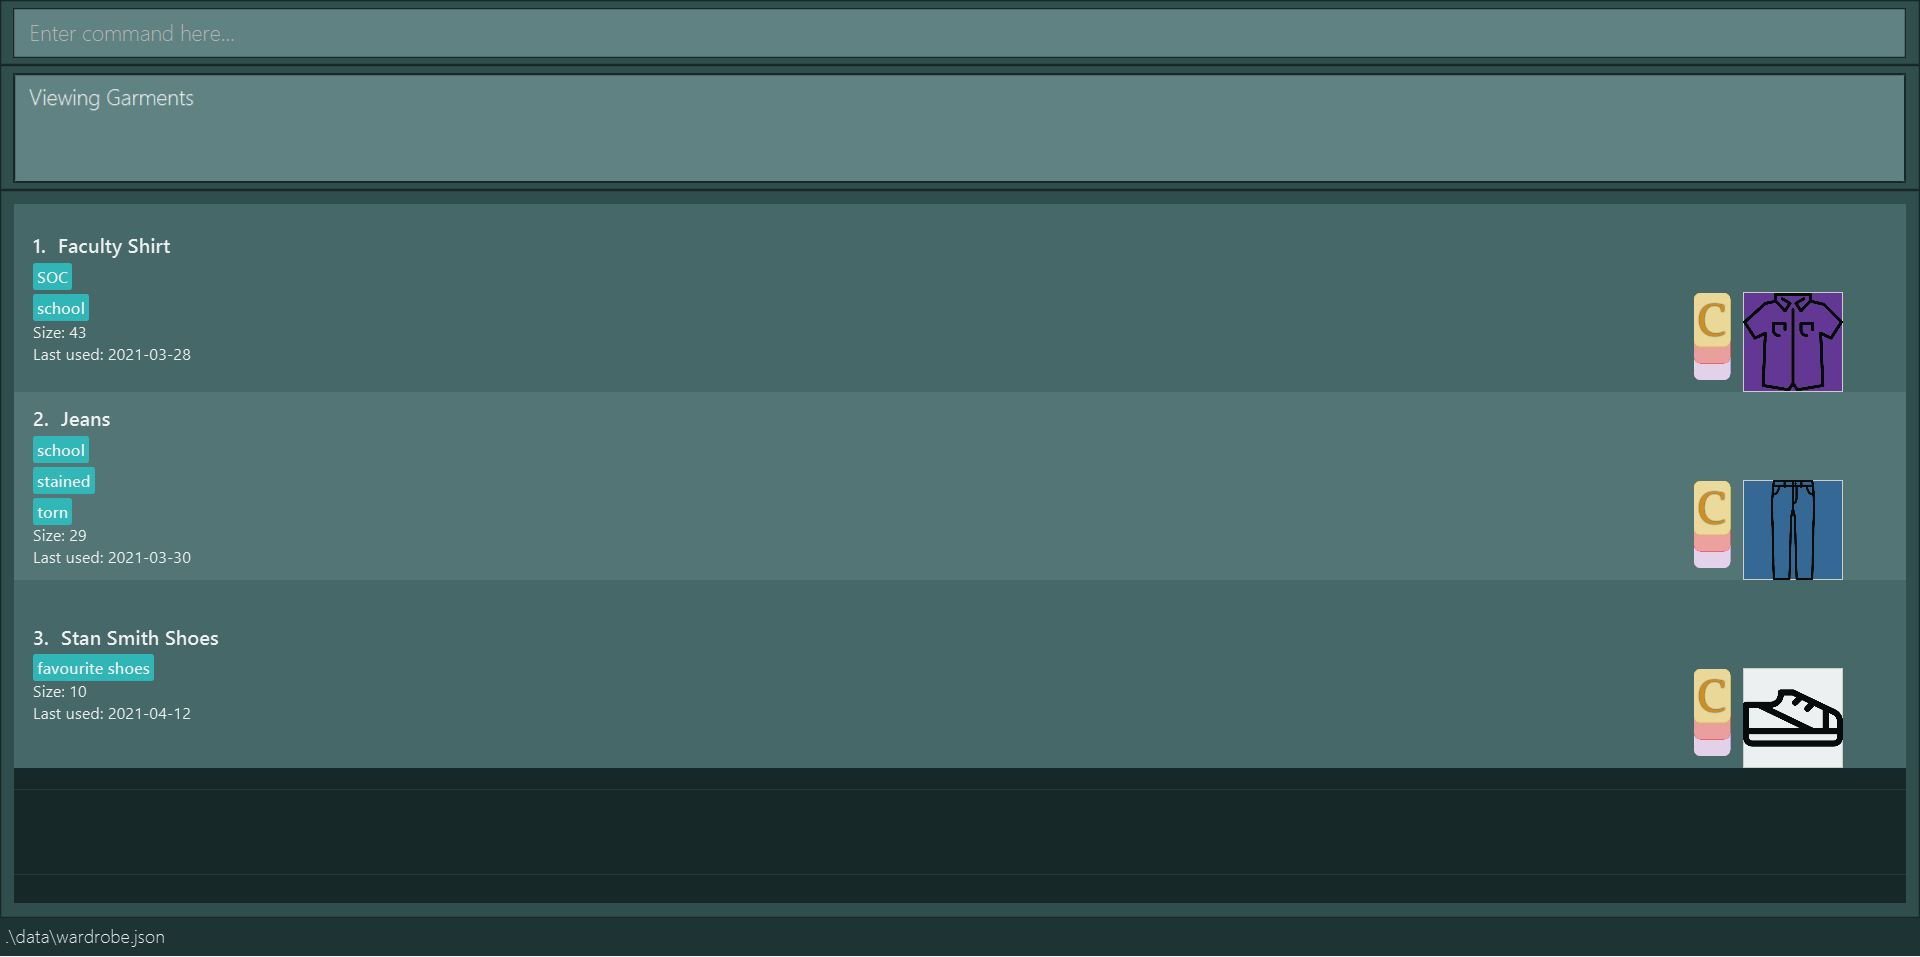
Format: view INDEX INDEX INDEX
![]() Tips:
Tips:
- Displays the garments at the selected set of
INDEX.
- The
INDEXmust be a positive integer 1, 2, 3, … - Garments must be of different Types (i.e.
upper,lowerandfootwear).
- Garments must be of the same DressCode (i.e.
casual,formal,active)
- The command must have exactly 3 indexes as input, any more inputs will not be registered.
- Use the coloured garment previews to visualise how your whole outfit will look like.
Example:
-
view 1 2 3
Saving the data
NuFash data is saved in the hard disk automatically as a JSON file under [JAR file location]/data/nufash.json after any command that changes the data. There is no need to save manually.
![]() Caution:
Caution:
Remember not to delete this folder as all your saved data will be discarded.
Editing the data file
Advanced users are welcome to update data directly by editing the data file at [JAR file location]/data/nufash.json.
![]() Caution:
Caution:
If your changes to the data file makes its format invalid, NuFash will discard all data and start with an empty data file at the next run.
FAQ
Q: How do I transfer my data to another Computer?
A: Install the app in the other computer and overwrite the empty data file it creates with the file that contains
the data of your previous NuFash folder.
Q: Who do I contact if I face any issues?
A: Tell us about your issue here, or better yet, submit a pull request with a way to solve it!
Command Summary
| Action | Format, Examples |
|---|---|
| Adding a Garment |
add n/NAME s/SIZE c/COLOUR r/DRESSCODE t/TYPE [d/DESCRIPTION]...Eg. add n/sleek tux s/32 c/white r/formal t/upperShortcut: Ctrl + a
|
| Deleting a Garment |
delete INDEXEg. delete 4 Shortcut: Ctrl + d
|
| Editing a Garment |
edit INDEX [n/NAME] [s/SIZE] [c/COLOUR] [r/DRESSCODE] [t/TYPE] [d/DESCRIPTION]...Shortcut: Ctrl + e
|
| Listing all Garments | list |
| Finding Garments |
find t/TYPEEg. find t/upper
|
| Matching a Garment |
match INDEX Eg. match 1
|
| Viewing a Garment set |
view INDEX INDEX INDEX Eg. view 1 2 3
|
| Selecting a Garment |
select INDEX Eg. select 1
|
| Clearing all Garments | clear |
| Help | help |
| Exiting the application | exit |
Credits
This user guide format has been adapted from AddressBook Level 3 User Guide